
TABLE OF CONTENTS

Weed Grinder
Cleaning a weed grinder can be one of the last things on your mind when all you want to do is enjoy your dank cannabis. However, keeping your grinder clean is one of the most important parts of an optimal cannabis smoking experience.
Think about it. You have this incredible-smelling weed that can get muddled with the age-old cannabis that has dried up in your grinder. The result is a lackluster experience and possibly harsh smoke.
If you want to have the best experience time after time, our guide on how to clean a weed grinder shows you why it's important, what supplies you’ll need, how often to clean it, and a step-by-step process on how to clean your grinder.
What Is A Weed Grinder?
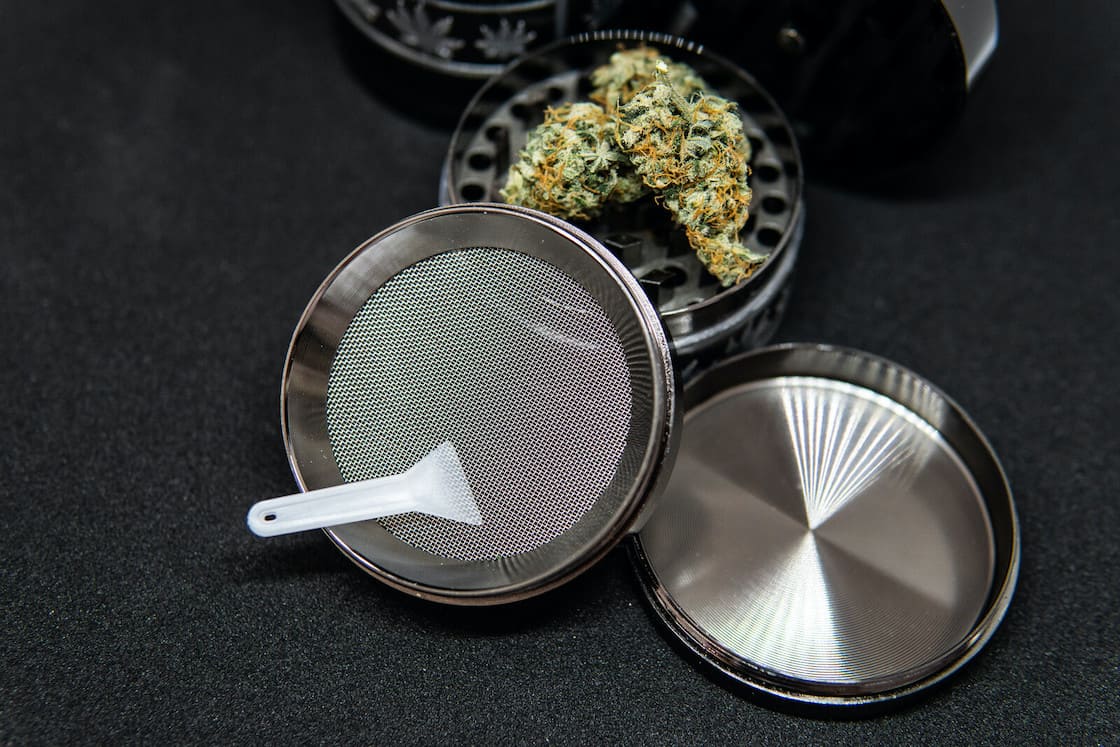
A weed grinder is an integral part of the consumption experience, particularly with dried herb. A grinder allows you to create a fine consistency of cannabis plant matter that is easier to consume in a pipe, joint, blunt, or bong.
The benefits of using a cannabis grinder include:
- Consistent burn
- Thick vapor
- Flavorful hits
- Densely packed bowls and joints
- Better kief collection
Sure, you can always break down your weed by hand, but a cannabis grinder is the best way to create a finer consistency for a better consumption experience.
However, not all grinders are the same. For instance, there's the basic single chamber grinder that has a lid and a bottom with grinding teeth that screw on together. With this grinder, you just place a few nugs between the teeth, place the lid on top, and start twisting and grinding.
For seasoned users, a multiple chamber grinder is the best way to enjoy weed. In this tool, the top chamber has the grinding teeth or blades where you can add the buds, place the lid on top, and start twisting back and forth to grind the herb.
Between the grinding teeth and blades, there are some small holes that allow the ground weed to fall through into the middle chamber. Then, you can unscrew the top chamber and lid to collect the weed from the middle chamber.
In addition, these multi-chambered grinders have a mesh screen beneath the middle chamber where the fine kief can fall to the lower chamber leaving only the larger parts of the cannabis on top. Some grinders can have multiple screens to separate even finer grains of kief. You can use the kief to enhance the potency of your buds.
Benefits of Cleaning Your Grinder
Cleaning your weed grinder regularly is vital to extending its longevity. In addition, keeping it clean ensures you get the perfect grind, without any built-up gunk or old weed affecting the flavor of your strain.
Extend the Longevity of Your Grinder
Over time, grinding up dank and sticky weed can clog up the grinder teeth, screen, and threads of your grinder. After weeks, months, or even years of accumulation, your grinder can become difficult to operate and result in an inefficient grind.
Whether you're trying to open, close, or just grind your weed, allowing the gunk to accumulate can affect its functionality and possibly break it if it is a low-quality grinder. Since the mechanism can get stuck, users may try to force twist the grinder, which can end up breaking it.
Prevent Bacteria and Mold Growth
With poor cleaning and maintenance, bacteria and mold can develop within your grinder, which can be harmful if inhaled. Generally, bacteria buildup can be normal, but when you add humidity and moisture to the mix, it can be a recipe for mold development, which can affect your health.
If you are a medical user or even a recreational user, you want to prevent mold development.
Remove Resin
Essentially, cleaning your grinder removes the built-up resin from every part, including its teeth/blades, threads, and screens. Regularly checking that every part of the grinder is resin-free can help you maintain a cleaner grinder and ensure you don't have to spend a long time cleaning it later on
One of the worst parts about the buildup of sticky trichomes is that it can prevent the magnetic lids from staying closed. If your lid connection becomes clogged from the trichomes, your lid can come loose and end up spilling all the weed and kief.
Collect Kief
Over time, the resin and plant matter can clog your screen, preventing the accumulation of kief. By cleaning your screen, you can ensure that all the kief is collected at the bottom of the chamber. Of course, you can replace your screen, but it is much more cost-effective to clean it regularly.
Better Function
Cleaning your grinder regularly ensures that you get a perfect and smooth grind time after time. Even if it's a cheap grinder, you can still improve its function with regular maintenance. If you do not clean it often, you can end up with resin build-up that can put extra strain on your wrists and hands when twisting and grinding.
How Often to Clean a Grinder
Cleaning isn't the most exciting or rewarding aspect of smoking or vaping cannabis, but it is one of the most important parts of the experience. Because of this, it is recommended to clean your grinder two or four times a year.
Every 3 to 6 months, you should give it a deep clean to ensure it is free from resin and bacteria. Of course, this depends on your frequency of use and the amount of resin that has built up.
Cleaning Metal vs. Wood vs. Plastic Grinders
Cleaning isn't a straightforward process. You must consider the type of material your grinder is made of before using chemicals and other cleaning supplies.
The most common type of grinders include:
- Metal grinder
- Wood grinder
- Plastic grinder
Although the cleaning process can be similar for most of the materials, there are a few considerations to keep in mind with each grinder so you can keep your tool in working order.
Metal
For metal grinders, you can use isopropyl alcohol above 91%. Avoid using bleach or other harsh chemicals that are not close to a neutral pH. If you do use harsh chemicals, you can end up damaging the grinder and removing the anodized coating that gives your grinder a scratch-proof exterior.
Wood
Since wood is porous, it is not recommended to use rubbing alcohol, soap, or water to clean it since it can absorb these substances. The most effective way to keep your wood grinder clean is to clean it regularly to avoid having to use more serious methods.
Keep around a toothbrush or paintbrush to gently remove the plant matter. Avoid using sharp objects that can create marks and grooves.
Plastic
For acrylic plastic grinders, isopropyl alcohol is not recommended. If used, it can dissolve and damage the plastic rendering it useless.
The acrylic plastic can swell or bubble up leading to a permanently damaged grinder. Plastic grinders are best cleaned with soap and water or in boiling water if your plastic grinder is very dirty.
Cleaning Supplies Needed to Clean Your Grinder
Ready to start cleaning your weed grinder to perfection? In order to remove the caked-on plant matter, leftover powdery kief, and sticky resin, you'll need a collection of cleaning tools to get the job done.
Here's what you'll need to get your grinder looking like new again:
- Dirty grinder
- Toothpick
- Small, soft-bristle toothbrush
- Freezer
- Isopropyl alcohol
- Stiff-bristle paint brush/toothbrush
- Resealable plastic bag or glass jar
- Clean water and soap
- Towel
- Paper towels
How to Clean a Weed Grinder
Now that you have learned the importance of cleaning a grinder and what you need to clean it, here's a step-by-step process on getting your herb grinder spick and span.
Step 1: Disassemble your Herb Grinder
This can be relatively easy or a little more difficult if you have ground herb and loose kief inside. If you do, you must take out the bud and kief before you clean it. Start by removing your loose bud into a separate container, preferably an airtight one. Kief can be kept on a small plate or bowl.
If you have a multiple chamber grinder, you can use the tiny shovel tool that comes with it or any other tool to remove the kief and pour it into a separate container. A plastic bag is not recommended since the kief can easily stick onto the bag.
Step 2: Use a Toothpick and Brushes to Clean the Grinder
After you remove the cannabis plant material from the grinder, it's time to take apart each chamber including the lid, top chamber, middle chamber, bottom chamber, and screen.
Here is where you can do a bit of pre-cleaning with your brushes and toothpicks. Use the pointy end of the toothpick to remove the caked-on resin from the threads, teeth/blades, edges, and screen without putting too much force into it, which could break it.
You can also use your brush to remove any loose powder and plant matter from the grinder screen and elsewhere to make your cleaning easier later on. Tapping the screen with the brush can help loosen the kief.
Step 3: Freeze It
Before you bring out the soap and water or isopropyl alcohol, you may choose to put your grinder in the freezer. The idea is that metal and acrylic plastic can be compressed which can loosen the built-up resin and kief from the threads, screens, edges, and crevices.
The kief can freeze, thereby, reducing its moisture level and stickiness, making it easier to come undone once you remove the grinder from the freezer.
Put your grinder in the freezer for about 20 to 30 minutes or up to an hour for best results. After you remove it from the freezer, use your toothpick and brush to dislodge any plant material that is now frozen.
As the ice begins to melt from your grinder, the condensation can also help loosen up the plant matter still stuck on the grinder. Now it's time to bring out the heavier-duty cleaning supplies to completely clean your grinder.
Step 4: Use Isopropyl Alcohol, Soap and Water, or Boiling Water
Here's where it gets tricky. You will use a variety of different cleaning methods depending on the grinder material you have. Isopropyl alcohol is used for metal. Soap and warm water and boiling water are used for plastic. Wooden grinders require special care.
Metal Grinders
When cleaning metal grinders, you can place them directly in a bag or another container submerged in isopropyl alcohol. Keep the grinder submerged for 30 minutes to an hour allowing the residue to break down.
After this time, you can remove the alcohol to look at the condition of your grinder. Is everything removed? Is there still some material left inside? In some cases, you can be left with some small leftover material that seems to be permanently stuck.
If you do have some leftover residue, you can give your grinder a rinse with water to see if it can be removed. If not, bust out the brushes and toothpicks to attempt to dislodge the leftover particles.
If you can’t remove it, you can do another submersion in isopropyl alcohol. If it still doesn't come out after its isopropyl rinses, it may be a lost cause. You can invest in a new grinder or keep using the one you have.
If you own a stainless steel grinder, be careful when using water to clean it. Make sure you completely dry it after using water to avoid developing rust.
After cleaning it, you want to allow the alcohol to completely evaporate or give it a good rinse with water and allow it to dry before you use it. At room temperature, isopropyl alcohol can evaporate quickly but you can also use a hairdryer to speed up the process and give it a few minutes to completely dry before you assemble it again.
Plastic Grinders
When cleaning plastic grinders, you don't want to use isopropyl alcohol. Instead, you'll be using boiling water or water and soap. If you're boiling your grinder, place the grinder in the pot in the beginning when the water is cool.
Leave the grinder there while the water starts to boil and then remove it from the pot. If not, you can end up deforming your grinder with hot water. Allow it to cool for about 10 to 15 minutes before assembling it. Right now, it can be a bit fragile, malleable, and hot.
If you'll be using soap and water to clean your plastic grinder, use a container and fill it with a combination of warm water and soap. Allow your grinder to soak in it for 30 minutes or longer if needed. Feel free to use a sponge or shake the grinder around the container to help loosen the material.
Afterward, take out the grinder and rinse off any soap and other plant matter with water.
Wood Grinders
When cleaning a wood grinder, you want to keep around a small soft bristle toothbrush or even a toothpick for stuck-on resin. You can use these tools to remove as many particles as you can. You can even use a lightly dampened cloth to wipe away the gunk from the wooden grinder.
“
There are over 300,000 jobs in the cannabis industry. CTU trained me for one of them!
 - Johanna Rose
Makes $24.50 @ THC +
Some users have found that lightly oiling the grinder with canola or vegetable oil can help keep your grinder clean. Make sure to give it plenty of time for the oil to dry before you use it again. If you use it before it completely dries, you can have moisture remaining in the wood grinder which can create mold.
Step 5: Dry the Grinder
After performing the deep clean with soap and water, isopropyl alcohol, or boiling water, it is important to let the grinder completely dry before you use it again. For stainless steel grinders, it can help prevent rust while for others it can also reduce the risk of mold formation which can be harmful to your health.
When drying plastic grinders, and using the boiling method, allow the grinder to completely cool for about 10 to 15 minutes before you can dry the leftover moisture. You can do so with a paper towel or hair dryer. A hairdryer can speed up the process to about 5 minutes or under. Just keep it in the lowest heat mode to prevent any malleability of the grinder.
When drying metal or wood grinders, you can use paper towels, a hairdryer, or allow it to air-dry.
Step 6: Reassembly
Now it's time to reassemble your grinder for use. By this time your device will be looking as good as new. However, if you did something wrong during the cleaning process your grinder could end up with a permanent deformation that prevents proper function.
This can happen when you don't clean the herb grinder as often. While you can invest in another magnet or screen, we recommend just buying a completely new one for about the same price.
Keeping Grinders Clean for Better Hits, Flavor, and Aroma
Keeping your weed grinders clean regularly can be a pain but it pays off time after time when you get to experience the full effect of your cannabis strain, especially if your smoking devices are also clean.
Learning how to clean a weed grinder can help you avoid inhaling the harmful resin smoke and enjoy the pure and unadulterated effect of your cannabis flower.

Fred Hernandez
Fred Hernandez is a highly accomplished and versatile writer, boasting an extensive background in the cannabis industry. With an in-depth understanding of various sectors including cultivators, processors, retailers, and brands, Fred's expertise spans across the entire cannabis landscape. As a prominent contributor to CTU, he consistently delivers insightful articles exploring the latest developments, news, and regulations shaping the cannabis industry. Whether it's delving into the intricacies of cannabis products, cannabis strain reviews, or providing comprehensive analyses of cannabis laws, or sharing expert insights on cannabis cultivation techniques, Fred's wealth of knowledge positions him as an invaluable writer and educator for all cannabis-related subjects.


 Jeff was involved in an accident where he endured a traumatic brain injury. He had a week-long stay in ICU where brain surgeons
  100% risk free money back guarantee within 48 hours after purchase if student has not completed any of the courses or exams.