TABLE OF CONTENTS
When it comes to growing cannabis if you want to produce an abundant crop of high-quality marijuana, then you’ll need to understand the essential growth cycle stages that each and every marijuana plant exhibits.
By understanding each stage, you’ll be fully equipped to grow any cannabis strain with ease and always find yourself harvesting photo-worthy flowers time and again.
Overview of the 4 Stages of Marijuana Plant Growth
Before we begin, let’s take a look at the 4 primary stages of plant growth. Take this time to familiarize yourself before we go more in-depth.
Marijuana plant growth cycle stages:
- Germination Stage
- Seedling Stage
- Vegetative Stage
- Flowering Stage
Each stage carries a myriad of important changes within the marijuana plant – and the cultivator is capable of making the overall growing process better or worse.
By understanding each stage, your cannabis crop will provide a seemingly endless bounty of aromatic, potent, and vibrant flowers.
1. The Germination Stage

The germination stage is potentially the most important stage when growing cannabis. It’s the point where a non-living seed that’s nearly indistinguishable from the rest suddenly bursts forth as a distinct individual.
The germination stage is significant because it’s at this point that the cannabis plant is most vulnerable. Everything is a potential danger – too much or too little heat, falling objects, a careless hand, or too much wind can snuff the life out of a cannabis seedling in an instant.
As with all living things, the first stage of life is where a foundation for the future is built. In the case of cannabis seeds, a healthy beginning will bring a fruitful end.
Things You Need To Know During The Germination Stage
Cannabis seeds germinate once they’ve been exposed over time to water and heat. These factors are essential to creating the biochemical process that “activates” the seed to start growing.
How Long Does The Germination Stage Last?
Depending on these factors and your method of germination, this stage may take between 3-10-days.
What Happens During The Germination Stage?
During the germination stage, you’ll notice that the seed will split, and a white “tail” appears. This tail is called the radicle, which is the scientific name for the root. This is the first part of the plant to appear because the root is the foundation for the plant.
Second, you’ll notice that a shoot will begin to push the seed casing upwards. Usually, the seed casing is pulled off of the shoot as it passes through the soil on its journey towards the light. However, if the seed casing remains on the shoot – allow it to fall off naturally.
Once the shoot and root emerge from the seed, the cannabis plant enters the seedling stage.
2. The Seedling Stage

The shoot contains two cotyledons, which are not considered true leaves. Instead, these two cotyledons contain a limited amount of food supply that the seedling will rely on as the root system becomes established.
Do Seedlings Require Nutrients at First?
It’s essential that you do not feed seedlings with concentrated fertilizers. The cannabis plant has evolved over millions of years and has handled itself without the help of humans just as long.
The seedling stage can last anywhere from 14 to 21-days, and during this time, you’ll notice key aspects that will guide you along to keep your cannabis seedling happy and healthy.
First, the cotyledons will begin to yellow as its nutrient supply runs out. Luckily, your cannabis seedling will have begun to develop “true leaves” by this point. True leaves are leaves that resemble the stereotypical cannabis leaf. However, the first leaves that emerge from the plant will have single leaflets with minimal ridges.
How Much Light Do Cannabis Seedlings Need?
Additionally, you’ll notice that the stem of the seedling will rapidly seek the light by increasing in height. This “stretch” needs to be avoided at all costs, which means the cultivator needs to lower the light towards the seedling canopy.
If you allow the cannabis seedling to stretch for the light, the elongated stem will be a hazard because the seedling will be very weak. A small gust of wind can break a seedling stem, which is why it’s essential to make sure your seedling stems are short and compact.
Cannabis seedlings do not need a specific amount of light at this point; however, it’s best that they remain under 18-24 hours of continuous light to keep them from stretching.
When Do You Give Cannabis Seedlings Nutrients?
As the seedling continues its growth over the next 2-3-weeks, each new set of leaves will contain more leaflets. In general, it’s after the 3rd set of leaves that cultivators can begin giving the cannabis seedling mild nutrients.
After 2-weeks, the root system is likely to have begun to colonize the small space of a rapid rooter or the cell of a propagation tray, which means it can be transplanted into a larger container.
As you transplant your seedling, you’ll quickly notice that the root system is indeed small. Take this into consideration as you water your seedlings, as they will not need too much at this point.
By the 3rd week, you’ll notice that your seedling is generating more leaves and is growing at a rapid rate. It’s at this point that the seedling stage is over, and your cannabis plant has entered a new phase of growth – the vegetative phase.
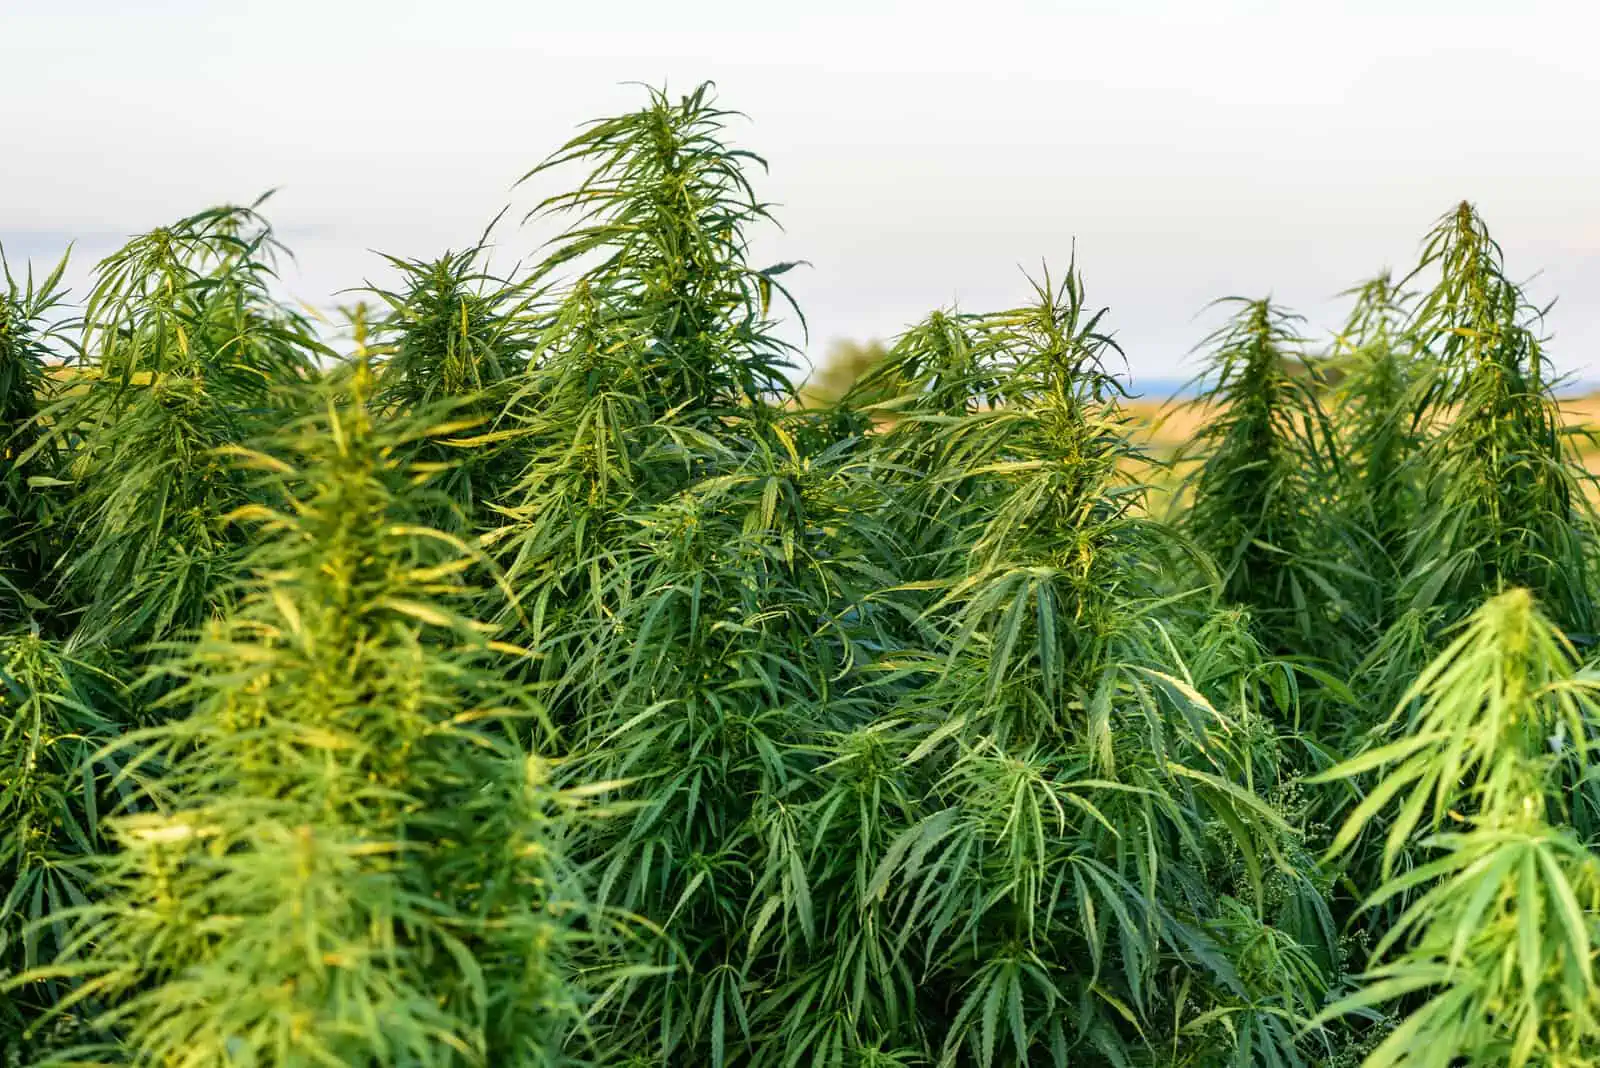
3. The Vegetative Stage

Depending on your growing method, you’ll spend a long or short period within the vegetative stage. The vegetative period signals rapid growth and the moment that will determine whether your cannabis plant is a male or female.
This stage is incredibly important for cannabis cultivators because growers use it to set their cannabis plants up for the flowering stage. The vegetative stage length can last anywhere from 3-18-weeks and depends on the cultivator’s overall plan.
Lighting Requirements During the Vegetative Stage
Furthermore, the vegetative stage requires at least 18-hours of continuous light. Some cultivators opt for 24-hours of light; however, this will increase your overall electricity bill.
Cannabis plants have the ability to stay in the vegetative phase for a theoretically unlimited amount of time – as long as they receive a minimum of 18-hours of light.
Remember, if you’re wondering how much light is for the vegetative stage – make sure to keep it at 18-hours and above.
What Kind of Nutrients For The Vegetative Stage?
When it comes to rapid growth and vegetation, plants require nitrogen. Nitrogen is the primary nutrient that helps produce lush greenery; however, it’s essential that you don’t forget to provide all of the other macro and micronutrients that are necessary for a healthy plant.
In the case of nutrition, it’s recommended that cultivators use an N-P-K (nitrogen, phosphorous, potassium) ratio of 10-10-10 because it’s balanced.
Rapid Plant Growth During the Vegetative Stage
The vegetative stage of cannabis plants is renowned for the sudden explosion of vegetative growth. This means that your cannabis plants will produce abundant leaves, nodes, height, and width. The root system will simultaneously grow, which means your cannabis plants will likely demand increased water and nutrients.
It’s during this point that cultivators employ a wide variety of growing techniques, such as the screen of green, sea of green, FIM, topping, low-stress training, and much more. Each of these methods allows cultivators to customize their cannabis plants to grow a certain way that will suit their grow space and benefit the overall yield.
If you’re seeking to grow many small cannabis plants, then it’s likely that your vegetative stage will last, at most, 3-weeks. Alternatively, if you want large bushy cannabis plants, then you may need to wait up to 18-weeks to reach the preferred height.
Sexing Your Cannabis Plants During the Vegetative Phase
During the vegetative phase, you’ll likely find out the sex of your cannabis plants. Cannabis seeds are male or female, but you’ll only find out once they are sexually mature. It’s usually during the 4-6-week of the vegetative phase that you’ll be able to determine which plants get to stay and which must leave.
In any case, where the overall goal is to produce cannabis flowers, females always stay, and males are discarded.
In general, male cannabis plants tend to show their sex earlier than females. However, you’ll need to wait for all of your plants to show their sex to make sure that you don’t have any hidden males in the flowering room.
Once you’re sure as to who’s who – you can discard the males and keep your females. It’s at this point that your cannabis plants are fully mature and can begin the flowering cycle.
The reason for doing so is because the last thing you want after months of time and money is a room full of seeded buds.
However, if you don’t decide to wait for your cannabis plants to sex during the vegetative stage, it can be done during the pre-flowering stage.
4. The Flowering Stage
This is the stage that each and every cannabis cultivator waits for. After weeks or months of time spent taking care of your cannabis crop, it’s finally time for the final growth cycle.
The flowering stage is unique because it actually contains two parts: pre-flowering and flowering.
The Pre-Flowering Stage

The pre-flowering stage is important because this is the beginning of the overall flowering phase.
The most notable aspects of the pre-flowering phase are:
- The 12/12 Stretch
- Flower Formation
- Sexual Maturity
Depending on the cannabis strain, your cannabis plants can stretch in size from 50% to a mind-blowing 300%. This means that, although you managed your cannabis plants to a perfect size during the vegetative phase, they will grow more.
This is why it’s always important to never reach your maximum allowable height during the vegetative stage. All growers need to take the infamous 12/12 stretch into account to ensure that they will have enough headroom to grow indoors or outdoors.
Furthermore, if you didn’t know the sex of your plants before you started the pre-flowering stage, you will by the time it’s over. This is because the change in light will force your cannabis crops to show their sex, which will instantly help you eliminate the males.
Once growers set their light schedules to 12/12, it only takes 2-3 days to notice big changes. Your cannabis plants will rapidly grow, and you’ll notice that the nodes will showcase developing flowers.
How Long Does The Pre-Flowering Stage Take?
The pre-flowering stage lasts for around 14-days. This means that, once you initiate the 12/12 stage, you’re looking at upwards of 2-weeks of growth and development. By the end of these 2-weeks, you notice that each node contains a crown of pistils, and the plant height has increased significantly.
The pistils will be a vibrant white color, and these small buds will continue to grow into large flowers as the rest of the flowering process continues.
The All-Important 12/12 and Why Cannabis Cultivators Use It
Once you’re ready to move to the final step, you’ll need to switch your lighting schedule to 12/12. As you remember, the vegetative stage required a minimum of 18-hours of light and 6-hours off. Now, to trigger the flowering stage, you’ll need to decrease this number to 12-hours of light and 12-hours of darkness.
The reason behind this phenomenon is because cannabis plants are photoperiodic. Since cannabis plants grow according to the seasons, it makes sense that cannabis plants rely on the sun for crucial information.
The sun reveals everything that cannabis plants need to know. For example, after a long summer with abundant sunshine hours, fall begins to set in. This means that the days become shorter – meaning less intense light. Cannabis plants recognized this as a signal that they need to find a male to pollinate them.
The overall goal of any living thing is to propagate its species into the future, and this is no different for marijuana plants. This is why cannabis plants begin to flower as the days become shorter. Instead of focusing energy on producing vegetative growth, all energy is focused on flower production.
Female cannabis plants become desperate as time passes without being pollinated by a male. To increase their chances, female cannabis plants increase the volume of their flowers. It’s this mechanism that cannabis cultivators exploit to grow massive yields of bud. It’s also for this reason why males are explicitly banned from the flowering room.
How Much Nutrient Do I Need To Use During The Flowering Stage?
To fuel the bud production, you’re going to need to step up your feeding schedule. In the case of the flowering stage, cannabis plants enjoy a higher dosage of phosphorus. Typically, lower levels of nitrogen are used because nitrogen is primarily used to help with the vegetative phase.
However, a balance of all macro and micronutrients are a must to keep cannabis plants healthy and productive through this final stage.
Marijuana Bud Growth
In most cases, cannabis plants finish the flowering stage within 9-10-weeks. However, certain strains are capable of finishing within 7-weeks while others may take upwards of 18-weeks.
However, you will notice different stages of bud growth as the weeks fly by. As we mentioned previously regarding the pre-flowering cycle – you’ll notice small buds forming by the end of week 2.
By week 4, you’ll notice that these bud sites will begin to swell. What you’re looking at is the increased size in the female calyx and the continuous growth of pistils. You’ll also begin to notice small glands that are sticky to the touch – these are the trichomes that contain cannabinoids.
As another two weeks pass, you’ll notice big changes in the flowering room. A pungent aroma will likely greet you, and the increased weight of the flowers will begin to be noticeable. Branches may begin sagging under the increased pressure of the growing buds.
It’s likely that you’ll be shocked that your cannabis buds have come so far after only 6-weeks of flowering. It’s also shocking to think that they still have 2-4-weeks left of growth.
By week 8, you should begin taking note of the trichome glands. The buds will have increased by a very large size, and depending on their genetic background, they may be large and spearlike or medium-sized, yet incredibly dense.
Hopefully, you took precautionary measures and implemented supportive tools to ensure that your buds don’t topple over or break under the weight.
If your strain goes into week 10 and beyond, it’s likely that they are large and resemble pictures you’ve seen in cannabis magazines or marijuana-specific websites. Your flowers should be drenched in trichomes and very sticky to the touch.
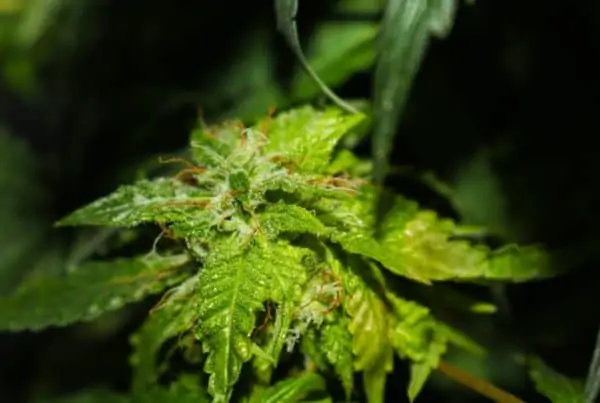
Checking The Trichomes During The Flowering Stage

Now that you’re between weeks 8 and 10, it’s absolutely essential that you begin to take a closer look at the trichomes. Trichomes tell growers when it’s the prime time to harvest the flowers.
As long as you have a jeweler’s loupe or handheld magnifying glass, you can check the trichomes for the best time to harvest your flowers. Trichomes age and their age is visible through their color.
Clear trichomes are young, which means they are not ripe yet. However, cloudy or milk-white trichomes are at their most ripe point. Once trichomes are amber, they are past their prime and have begun to degrade.
It’s when the majority of trichomes are milky-white that you should begin the harvesting process and end your grow. Remember, the most potent peak is within this milky-white trichome. As the trichome turns amber and begins to degrade, so does the overall potency.
Ending The Flowering Cycle
Finally – you’ve just finished the flowering stage. Whether you took your cannabis plants to the 8th week or the 11th week, it’s time to harvest your cannabis crop. After many long hours, your patience and determination will pay off.
The flowering cycle is the culmination of the germination, seedling, and vegetative stages combined. As you can see, each stage directly relates to the next, which is why it’s essential to understand each stage and what it entails.
After Flowering Stages
After the growing stages are complete there are two more important stages.
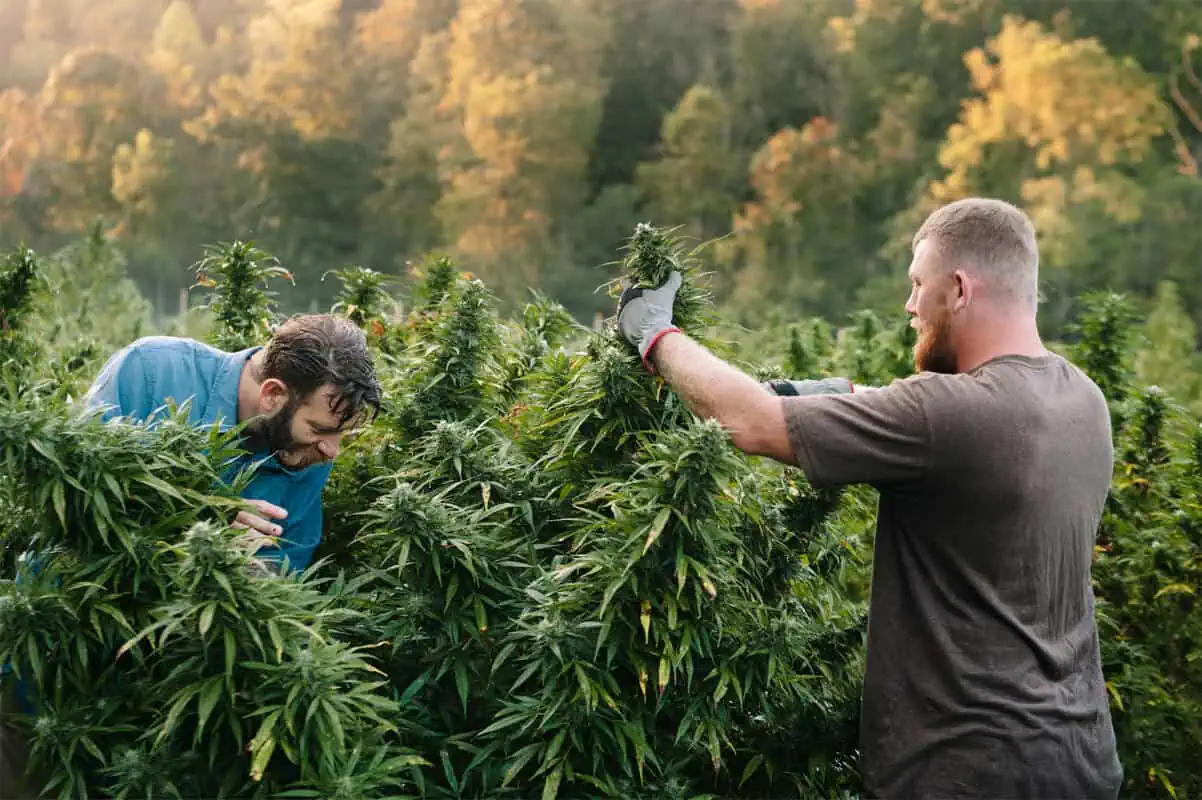
1. Harvesting
Once you’ve gone through the entire life cycle of your plant, it's time to reap what you’ve sown. During the harvesting stage, you can cut down branches with buds once they reach peak ripeness.
Some growers will wait until the plants grow white pistils all over, while others will pay close attention to the color of the trichomes to determine when to harvest.
After cutting down the plants, some growers choose to prune their excess foliage to improve the appearance of the bud. In addition, removing the excess plant matter can reduce harshness when smoking or vaping the weed.
Growers can choose between the wet or dry method of trimming their plants. Each trimming method has its own unique pros and cons, but most choose to trim dry cannabis buds.
“
There are over 300,000 jobs in the cannabis industry. CTU trained me for one of them!
 - Johanna Rose
Makes $24.50 @ THC +
Once you’ve trimmed all the fan leaves and sugar leaves, you can begin the drying and curing process. During the drying process, plants are kept in a cool, dark, and dry room where all the excess moisture evaporates and the plant’s flavors and aroma come to life.
2. Curing (1-2 Months)
After the drying process is over, the curing process begins. It involves storing cannabis buds in UV-protected glass jars. Curing can take a couple of weeks or months for the potency, flavor, and aroma to reach peak levels. The curing process is the last stage of growing weed. Congratulations you did it!
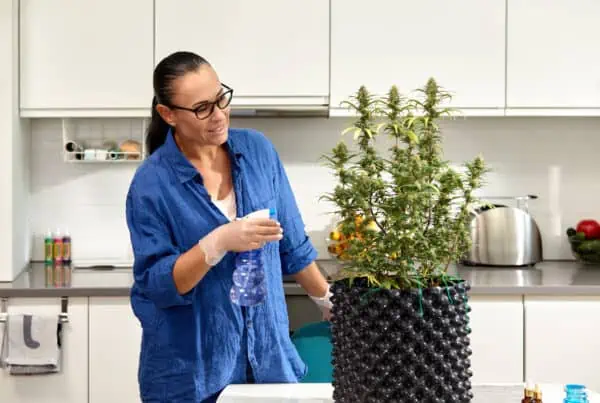
How Long Does It Take To Grow Cannabis Indoors?
When you grow cannabis indoors, you don’t need to rely on the seasons. Instead, you’ll provide an artificial environment that will stimulate your cannabis plants to produce leaves and eventually, flowers.
In general, growing cannabis indoors can take between 3-4-months. This means that indoor cultivators can realistically perform 3-4 harvests per year. This number can be decreased as cultivators learn how to use cannabis clones rather than cannabis seeds.
It’s Time To Take Your Knowledge And Turn It Into Action
By understanding the lifecycle of marijuana plants, you can increase your yield and become a better cultivator over time. Now that you understand how the cannabis plant works – it’s time to get your hands dirty and begin growing your own marijuana!
How big should a cannabis plant be at 3 weeks?
Healthy cannabis plants at 3 weeks are usually between 4 and 6 inches.
What should my buds look like at 5 weeks?
Your buds should be well developed and becoming more substantial and denser. You will start to see an increase in the number of pistils (hairs) on the buds.
How tall do cannabis plants get before they bud?
The height at which cannabis plants start to bud depends on factors like genetics , the growing environment, and how they've been trained or pruned during the vegetative stage.
How do I increase my plant growth speed?
Water, air, light, nutrients in the soil, the right temperature, and love and attention.
Marijuana Grow School
Looking for a marijuana grow school online? Want to learn how to grow weed like the pro's?
Have you always wanted to grow your own cannabis at home? Or do you want to be a marijuana grower for a living?
Sign up today and learn what you need to start your own cannabis grow or a marijuana grower job.
Learn it all, right from your phone, on your own time, with no schedules, all from the best cannabis training school online.
Now that you know the marijuana plant growth cycle stages, it's time to get growing your own cannabis!

Luis Cordova
Luis Cordova is a distinguished author, and renowned expert in cannabis cultivation, who possesses a Master's degree in Plant Biotechnology and Pharmaceutical Science. As a valued contributor to highly esteemed publications such as Cannabis Training University and Maximum Yield Magazine, Luis has emerged as a trusted source of guidance and knowledge in the cannabis industry. Having written thousands of informative articles, Luis is widely recognized for his comprehensive expertise on cultivating cannabis, both indoors and outdoors.


 Jeff was involved in an accident where he endured a traumatic brain injury. He had a week-long stay in ICU where brain surgeons
  100% risk free money back guarantee within 48 hours after purchase if student has not completed any of the courses or exams.